
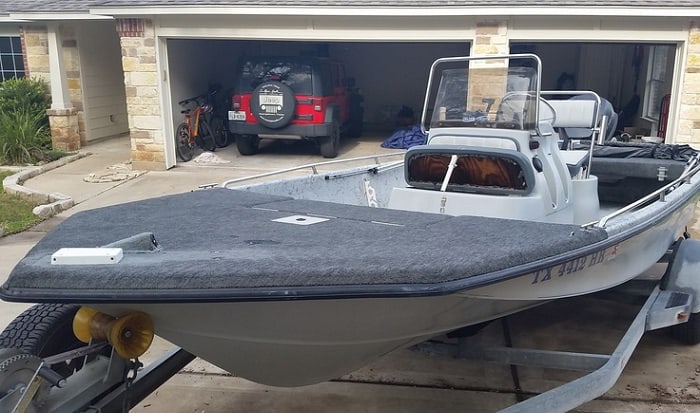
The boat carpet is a great addition to a boat. It provides better looks and can prevent potential slipping. However, a carpet will slowly wear down because of exposure to rough environmental conditions, hence losing its charm or even functionality.
If you have/ wish to have a boat with carpet, an important practice is to know the boat carpet replacement process. You may find this difficult, but once having a clear understanding of what to do, it can be surprisingly easy. Thus, continue reading this article about how to replace boat carpets for a simple yet thorough guide.
Table of Contents
What You Need to Prepare
The tools and preparations to recarpet the boat are neither too simple nor too complicated.
About the cutting and measuring tools, you’ll need a utility knife, a tape measure, a paper roll, a scraper along with acetone, some rags, a staple gun, and likely a screwdriver. To hold the carpet in place, you will need some clamps or weights if available.
Another thing you must prepare beforehand is marine-grade adhesive. This substance can withstand constant exposure to water (and moisture in general) over a long period, thus providing you with better tenacity.
As for the main character – the carpet replacement material, there are many different choices for you to make, each has its own strengths and weaknesses:
- Many owners chose to go with a new marine carpet. It can improve the appearance of your boat significantly. Yet, carpets tend to lack durability and waterproofness compared to other types while being more expensive and take longer to install.
- Another option to replace marine carpet is using truck bed liners. They can have smooth or more textured options, easy to clean, have water resistance, and are quite durable. The best part is their affordable prices.
- Snap-In Carpet is also an inexpensive and more flexible alternative. They offer various styles, are more convenient to install (which reduces the time and cost required), have decent longevity, and can be replaced easily if they are damaged.
- Replacing boat carpets with vinyl can bring you wonderful experiences. Woven vinyl flooring is great to walk on and has a variety of colors and textures. They are also easy to clean and do not get affected by even strong chlorine-based cleaners.
- Can be quite different, but Durabak marine paint is an incredible boat carpet alternative. Durabak bonds to almost any surface while increasing the minimum weight to your boat. They provide UV-resistant, waterproof and vibrant colors for you to choose from.
After preparing all the tools and materials needed to replace your boat carpet, it is time to coat your boat floor with a new, better look. Hence, please continue reading this step-by-step guide to replacing the boat floor and carpet.
Step-by-Step Guide
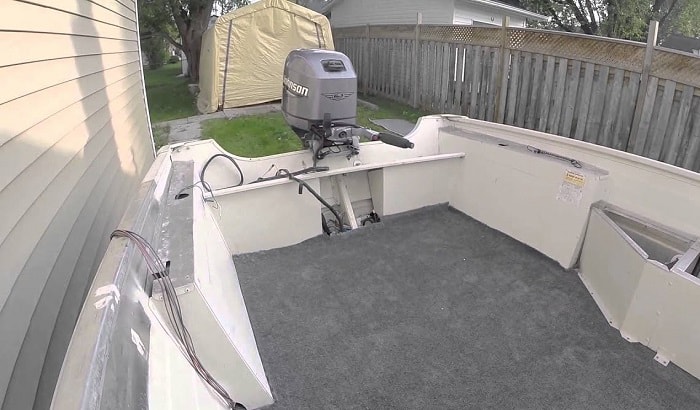
Step 1 – Get rid of the old boat carpet
Everybody knows about this first step, and most also know that it is better said than done. To remove the old carpet, you must put in a lot of work, depending on the amount of glue adhesion applied on your boat.
First of all, temporarily remove your deck/pontoon furniture so you could have the free space to move around when replacing your boat carpet.
Now, carefully check the carpet by every nook and cranny, pay attention to any broken or warped parts in your deck. Another tip to make your life easier is marking any carpet corners so you could quickly find them later.
If you do not find any rotten/broken parts, it is alright to remove the carpet from one of its corners. This step could potentially be quite troublesome if the old adhesive still remains strong. In this case, your best choice is to cut the boat carpet into smaller pieces and tear them apart one by one.
Removing the carpet is not everything, even when it is done, you still need to make sure that not a single trace of the former adhesive or the carpet back is left behind. You can use a clean cloth with some acetone solvent to wipe away the old glue (the cloth doesn’t need to be soaked, just slightly damp).
If you want to use a glue scraper, do not use too much force, else you could damage the deck unintentionally. Having the deck clear completely is very important as they will significantly improve the condition and longevity of your new adhesive layer when applied.
For the last work, take a good look at the deck and make sure there isn’t any extra maintenance needed before going to the next step.
Step 2 – Making the different parts
You have gone through the step that required lots of dedication and hard work, now it comes to meticulousness and care.
You need to start by measuring the total area of the floor using a meter. This will make you know the amount of new carpet needed to cover your entire deck. Also, consider your personal usage to pick the carpet type. For example, vinyl is an ideal material to replace boat carpets with non-skid.
After that, stretch out a paper roll and fill your marine flooring, exceeding by some feet as a preventive measure. Your next thing to do is attach the paper to the deck you want to cover, thus forming a template. You don’t need to be too precise, it is hard for people to figure out the slight imperfection with naked eyes.
One little tip for you when going around the curved corners is to make some vertical openings on the paper. By doing this, they will easily fit around those areas. Meanwhile, you must add extra tape where more strength is needed.
As you cover your deck, try to keep the papers in a single form by taping them all together. Next, cut away the spare paper on the borders. Be careful not to scratch your deck while you do the cutting.
Now, you need to lift the completed paper template from your boat and move to where the new marine carpet roll is. Unroll the carpet on a wide and flat surface to accommodate all of its length. More so, remember to have the PVC springs facing up.
Next, adjust the marine carpet with your paper template to the best fit. You should carefully arrange the different parts so that there are minimum wasted carpet areas. Now, you can move on to the easier part. Just cut along the template using a sharp razor, and you have done it.
Step 3 – Stick the Marine Carpet down
This is the last and probably the easiest step, yet there is no room for negligence if you want your carpet to last long.
Follow the instructions of what to prepare and pick the most suitable adhesive for your boat. Protect your hands with plastic gloves, then evenly apply the adhesive on your deck’s floor with a 1/16 notched trowel.
You need to use just the right amount of adhesive. If you use too much, the glue can spill from the corners of carpet parts when you put them down. If you use too little, there may not be enough adhesion, obviously.
For small surfaces, instead of the 1/6 notched trowel, it is ideal for you to go for the mason one. Just make sure that the adhesive is spread evenly.
Now, put the carpet on your deck while the adhesive is still wet. After half an hour to one, the adhesive will start to be set. Try applying some pressure evenly on the boat carpet surface, so it will stick better to the deck. And that’s it for your carpet replacing process.
Conclusion
Replacing the boat carpet indeed takes some effort, yet it is not really difficult. With some dedication and meticulousness, you can handle it all by yourself and find the hard work is absolutely worth, it for all the improved looks and longevity.
If you have any questions or personal opinions on this topic, please tell us in the comment section, and don’t hesitate to share this guide on how to replace boat carpet with your friends who have similar needs. Thank you for reading!

I am passionate about water sports and technical fields, so combining both makes me interested in making contents about boat accessories. With my partner, we went on many trips and sports games together, which led us to think about how we can spread our joys and passions to many people.