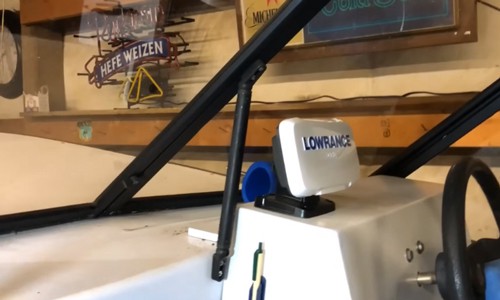
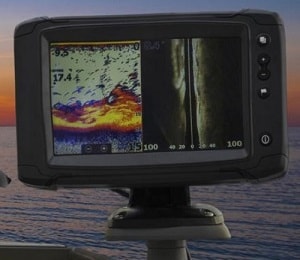
Fishfinder is an electronic instrument with a display that uses sonar to provide information regarding what’s below the water’s surface. In addition, this depth finder is equipped with GPS and navigation features, making it suitable for fishing in deep waters.
As such, fishermen, especially those engaged in commercial fishing, can enjoy several benefits from using a fishfinder. Apart from allowing them to see schools of fish, this device will enable them to learn information such as water depth, seabed, etc.
This short guide will tell you how to install a fishfinder on a boat, and better your chances of a hefty catch.
Table of Contents
Materials to Prepare
1. Fishfinder
Before installing a fish finder, you must identify the type of device that would be compatible with your boat’s size and make or model.
- Larger vessels may require permanent fish finders installation—a rather complicated process that involves drilling in the helm or hull. Therefore, you’ll want to choose fixed-mount or networked models.
- On the other hand, smaller boats may only require the device to be bolted on one side or mounted to the consoles. As such, you can opt for standalone fishfinders on a kayak, although the image resolutions may be a little low.
In addition, you’ll also want to consider its technology. 2D sonar is the oldest type and can travel deeper in the water, although it has a low resolution. A modern option like live sonar, meanwhile, offers real-time video feedback, but it can only cover a small area.
2. Power Source
You will need a power source to operate a fishfinder. You can connect it to your boat’s battery or have a separate one. The advantage of the latter choice is you don’t risk depleting your boat’s battery right away.
3. Mounting Kit
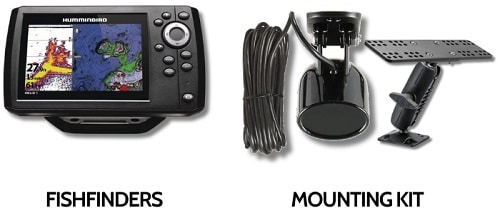
When you purchase fishfinders, they come with a kit. This includes a mounting bracket, transducer, and screws.
For those unfamiliar, a transducer scans the water using sonar beams. The display monitor shows you where the fish are and other objects beneath your boat.
4. Wiring
Some kits already include cable wiring. But make sure the length is enough to connect the transducer to the power source.
5. Tools
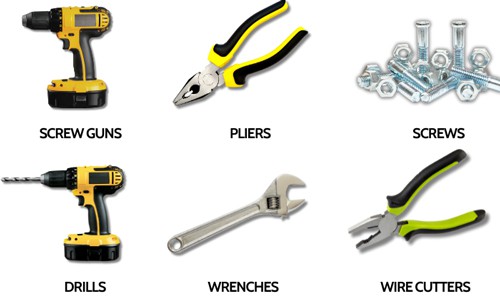
Make sure you have screw guns, screws, pliers, drills, wrenches, and wire cutters.
Step-By-Step to for Fish Finder Installation on a Boat
Here are the DIY ways to properly install the device. If you are comfortable drilling holes into your boat, sawing, etc., then you can follow this guide. Otherwise, it is best to consult a professional to ensure your device is secure.
1. Determine the Placement
The mounting location should give you easy access and viewing while you’re fishing. That aside, ensure enough space and depth so that no wiring will be affected once you drill the holes for the installation.
- In small boats, it is best to mount a fish finder on the bow.
- For large boats, having good coverage is crucial, so you should install multiple fishfinders in different areas. Take note there are other suitable devices and ways of installation on a kayak and on an aluminum boat, for example.
2. Installing the Transducer
This is the most essential part of the unit. The fish finder transducer shoots the SONAR (sound navigation ranging) beams into the waters, which you can view using the display unit’s screen.
- The transducer part should be attached to the bottom of your boat or on the starboard side of the transom. To ensure harsh waves and debris won’t damage it, the mounting place should be 0.25-0.5 inches up from the boat’s bottom and away from the motor.
- Once you have found the perfect spot, use the plate as your reference for marking. Most units come with templates and an instruction manual. It is best to cross-check if all accessories are complete before you start your DIY project.
- Take measurements of the area where you will mount the fishfinder. This ensures precision when you start drilling.
- Drill holes to make space for the mounting bracket, which must be level with the boat’s bottom. Use the power drill at full speed to avoid splinters. Apply sealant (e.g., 3M 4200 Fast Cure adhesive) around the holes.
- Secure the mounting bracket with screws. Again, use sealant on the screws to seal off moisture. This also prevents them from accidentally becoming undone by the pressure of rough waves.
- Connect the transducer to your display unit using the included wiring. If there are none, you can use a zip tie or a clip as a substitute for wiring for fish finders.
In any case, check the wiring diagram in the manual for reference.
3. Installing the Display unit
Similar to how you affixed the transducer, the display unit involves mounting. This means you need to do the steps mentioned above (marking the plate, drilling holes, and finishing off with a sealant).
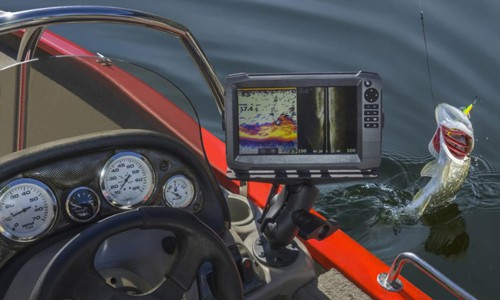
However, the placement of the unit is typically close to the helm. This makes it easy to monitor the screen as you steer the boat. This is why the screen should be level with your chest and not interfere with wiring and other accessories.
4. Powering up the Fish Finder
There are different options for you to operate your fish finder. Some like to use battery power, while others opt for AC power.
- To connect the instrument, find the two cables that come with the unit. One is the positive lead, and the other is the negative lead.
- Match the leads of the cable and the terminals of the battery such that positive goes to positive and negative goes to negative.
- Some cables are quite long, so you’ll need a cable tie to shorten it or keep it from becoming entangled. Don’t snip the wires, as you may need the extra length in the future.
- To better prepare for emergencies like a power surge, connect an inline fuse holder between the positive wiring of the battery and the fish finder.
For video tutorials, you can see examples here and here. The first one uses a Lowrance fish finder, while the other uses a fish finder on a Jon boat.
Frequently Asked Questions
Can you hook up a fishfinder straight to the boat’s battery?
Yes, this is a common fish finder setup. However, it is recommended to use a separate marine battery. After all, you want to take away the added pressure on the boat’s main battery.
Is it difficult to install a fishfinder?
Generally, if you have standard units, installing a fishfinder without proper knowledge and skill is possible.
However, some units or modern versions may require a complicated process. For these, you need to strictly follow the manual from the manufacturer or consult an expert.
How much is the installation cost?
The installation cost for fishfinders ranges from $100 to $1,000, depending on the complexity of the process and the service you consulted with.
Conclusion
Knowing how to install a fishfinder on a boat is useful, especially to those who are on a budget and don’t want to opt for a professional service.
From identifying the best fish finder to using the provided brackets and tools, mounting the device takes careful measurements. You need to gauge the best spot that gives you access and convenience to using the fish finder.

Ten years of enjoying countless trips on boats never made me love them any less! So I am here to put all those experiences into good use for other boaters who want to have a safe and fun trip with their friends and families.

