
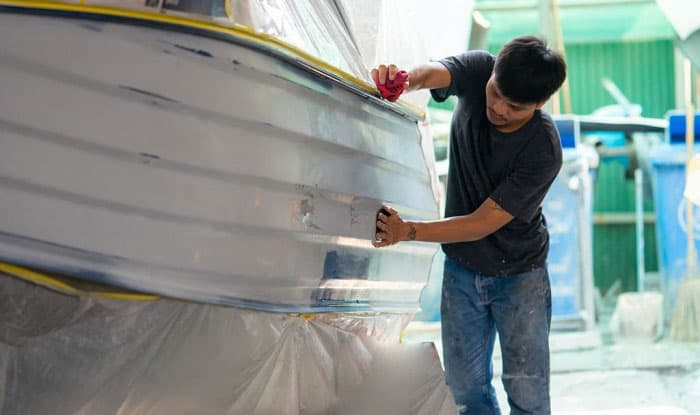
After being used for a long time, it’s somehow very difficult for aluminum boats to appear as dashing and astonishing as they were when you first purchased them. Some boaters may find this disturbing and want to get rid of their crafts right away. However, there are solutions that can help you refurbish your aluminum vessel effortlessly.
When looking at an aluminum watercraft, few things may detract from the dazzling brilliance of polished metal like pitting. These stains, on the other hand, are more than simply a few spots that won’t disappear. They may be a harbinger of a larger issue to come.
If you’re looking for proper instruction on “How to remove pitting from aluminum boats?”, this article is perfect for you! In this post, we will compile every step to proceed with cleaning pitted aluminum boats.
Moreover, tips on the aluminum pitting corrosion repair process will be highlighted so boaters can easily practice this procedure. Follow the sections below to find out more!
Table of Contents
An Introduction to Pitting

Before we get to the detailed instructions of removing pitting on aluminum vessels, it is necessary for boaters to understand what pitting is and what causes it.
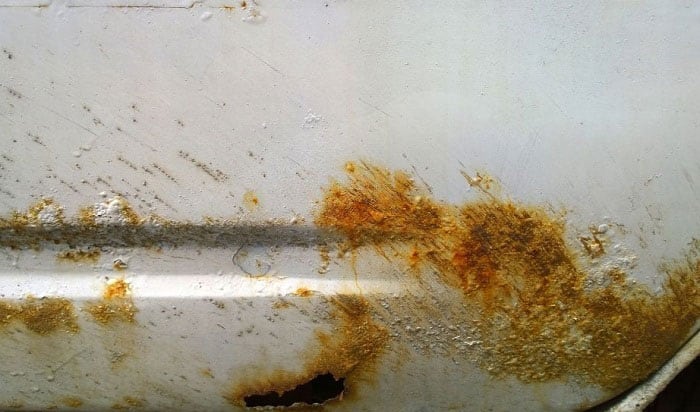
Pitting is the term used to describe cavities or “pits” that occur on a vessel’s aluminum surface as a result of corrosion damage in fresh and saltwater.
Wider pitting arises from more severe oxidation So, it is essential to tackle corrosion and pitting as soon as possible. Years of mismanagement can cause structurally deteriorated metal that is no longer usable.
Since it appears as small patches that do not represent pits at all, pitting might be difficult to see at first. When oxidation symptoms appear, corrosion should be treated immediately.
However, it is way better to avoid oxidation from forming in the first place, saving your watercraft from pitting.
Essential Tools and Equipment to Clean Pitted Aluminum Boats
In fact, since this task is a combination of many different skills, from polishing aluminum boat’s surfaces to washing your vessel, tools and gadgets for cleaning pitted aluminum vessels are easy to find. Here is a list of primary equipment for the process:
- Buffer
- Polish and wax for aluminum surface
- Power washer
- Sander
- Aluminum cleaner
- Sandpaper
- Aluminum restorer
Further Notices While Dealing With Pittings on Aluminum Crafts
Expert boaters often have some useful tips to simplify the process of fixing pitted aluminum boats, including the methods of utilizing various tools or techniques for tackling pitted spots. Continue reading to know the details:
1. Wet sanding technique
The issue with sanding is the filthy dust, particularly when dealing on bigger areas and sandpaper accumulation. These issues, nevertheless, only exist when you practice dry sanding. Meanwhile, wet sanding can prevent dusty leftovers on the surface and reduce a step of cleaning the aluminum area once again.
Thus, there are many ways to proceed wet sanding on the aluminum boat’s surface but most of them have to be done by hand. Additional equipment may be used. Although, since this technique takes more time and removes less material, it is necessary to proceed it manually using high grit sandpaper with special liquids.
You can moisturize the sandpaper with a water mixture as well as a very tiny amount of dishwashing soap to prevent the aluminum from being damaged. When you replace the usual sandpaper with the wet sandpaper, abrasion should be better controlled and the sanding process will be less dirty.
2. Equipment
It is advisable to use power equipment like power washers for cleaning pitted metal and polishing. It requires a lot of time and work to polish pitted metal, and having the appropriate tools can help you get better results faster.
Steps to Remove Pitting From Aluminum Boats
After preparing enough tools and gadgets, it’s time for us to practice removing pitting from our boats. Follow these steps and bring the dazzling outlook back to your vessel.
Some of the steps can be re-ordered or skipped depending on your conditions and skills. But if this is your first time doing this, make sure to follow the guides carefully. Now, let’s begin!
Step 1: Washing the aluminum vessel
The first step is to thoroughly wash the pitted aluminum boat. While washing using soap and water is sufficient, not all soaps are suitable. Products that contain high levels of alkaline or acids should not be utilized since they remove the aluminum’s inherent defense. Dishwashing detergent is one example of such a soap.
Pick a good soap with a moderate alkalinity level, or apply a cleaning fluid designed particularly for metal. This guarantees that the aluminum’s corrosion resistance remains intact. A power washer is also good for removing stubborn stains such as dirt.
Step 2: Sanding down and buff the pittings
The next step is to sand smoothly the pitted areas of the metal. Ensure that the surface area is dry. Sand the pitted sections with 200 to 400 grit sandpaper. After the first pass, change to 600 grit then make a second pass to produce a smooth texture.
Three to four passes should be suitable. Always begin with the coarser grit and go to the finer grit after every pass. Sanding manually is not suggested since it takes too long and requires too much work to get results. You should use an electric sander instead.
The surface of the metal will be dirty after sanding, and signs of pitting will persist. The traces should be removed by buffing the surfaces. Nevertheless, it is essential to be realistic about your goals; buffing will require a significant amount of time and effort to be successful. Also, after polishing, brush away any dust.
Utilizing an electric buffer is strongly suggested, although even with one, positive outcomes will take a long time.
Step 3: Restoring pitted aluminum parts
The next critical step in recovering pitted metal is to use an aluminum restorer. Because pitting is caused by aluminum corrosion, you may assume the entire metal surface has been corroded to some extent. This must be clarified.
Simply follow the directions on your selected aluminum restorer. This should reduce the oxidation deposit on the metal, which is where corrosion starts. Eliminating the rust restores a few of the aluminum’s lost luster. Restorers are coupled with cleansers or even polish, so any of them would be appropriate to utilize.
Step 4: Applying wax to polish pitted aluminum sections
The final step is to clean and wax the metal. While the polish returns much of the sheen to the metal, it also protects it from harsh weather and oxidation. Applying wax will make the aluminum’s protective layer last longer. Hence, you won’t need to polish it as frequently.
Just be sure you spray the polish and wax evenly. For quicker and more effective results, use an electric polisher. Combining different polish and wax allows you to manage corrosion and avoid pitting. Once you’ve completed this final step, you’re finished!
Conclusion
Removing pitting from aluminum boats is an important task if you want to refurbish your vessels and return to their dashing outlook. There is no need to seek cleaning services or professionals when you can easily practice this procedure by yourselves using our instructions above.
We hope that our information will assist you and your crew in removing pitting on aluminum watercraft, making your sailing journeys with family and friends safer!
Did you enjoy the article on how to remove pitting from aluminum boats? Do you want to add anything else? Please let me know and leave a comment below.

Ten years of enjoying countless trips on boats never made me love them any less! So I am here to put all those experiences into good use for other boaters who want to have a safe and fun trip with their friends and families.