
Although building a Jon boat is not always the best option for boaters since it requires much time, effort, and different techniques, many people are still fond of this activity as this is the most common and gratifying method to start boating.
For a long time, making plywood Jon boat plans has been preferable among hobbyists, boat owners, and DIY enthusiasts. Similar to many other wood-crafting projects, constructing a DIY boat may save a lot of money while also being a fun learning experience despite some difficulties in finding tools and studying woodworking tactics.
Therefore, this discussion is the perfect place for those who are seeking a detailed tutorial of how to build a Jon boat. In this article, I will introduce simple steps that you can use to build your own DIY Jon boat with only a minimum budget, such as:
- Step 1: Make the Jon boat floor
- Step 2: Preparing the first cleat panel and bottom rails
- Step 3: Gluing and screwing
- Step 4: Creating the seats and sides
- Step 5: Customizing, finishing, and cleaning
Moreover, a list of tools and equipment required for the construction process as well as methods to keep the jon boat more stable will be highlighted in this discussion so you and other boaters can easily customize their own homemade jon boat. Continue reading to learn more!
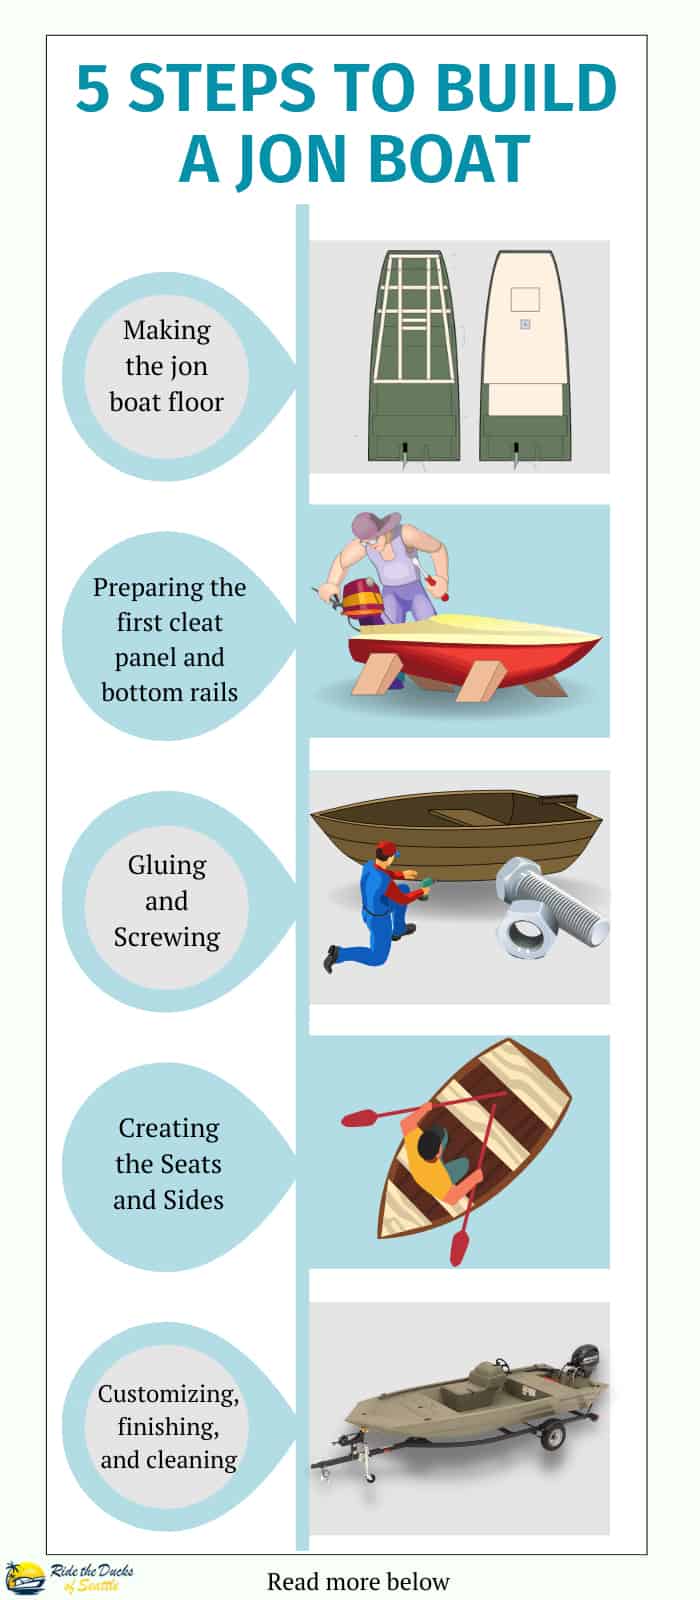
Table of Contents
What to Prepare for Flat Bottom Plywood Boat Plans

While making DIY plywood jon boat plans, the only things that cost you are materials and tools, since you need to obtain and select proper plywood to guarantee the quality of your vessel.
These following tools are usually required for flat bottom wooden jon boat plans. Please keep in mind that this list does not contain any alterations or extras you might want to include to your jon boat:
- 5/8 Plywood (We highly recommend purchasing the carpet-covered, pressure-treated or marine-grade types for the most affordable price and nicest color.)
- A saw of any kind. (For example, a table saw, an electric hand saw or a miter saw.)
- Clamps
- Flexible ruler
- Pencil or chart
- Compass
- Regular screws or electric screwdriver
- Gorilla glue
- Power sander
5 Steps to Build a Jon Boat
As there are many different materials used in the boating industry, techniques to build each type of craft are also varied. This is applied to flat bottom vessels as well. However, in order to minimize the cost, we will provide a thorough tutorial on how to build a flat bottom plywood craft – the most popular and affordable jon boat to work with!
Here are steps to proceed flat bottom plywood boat plans:
Step 1: Making the jon boat floor
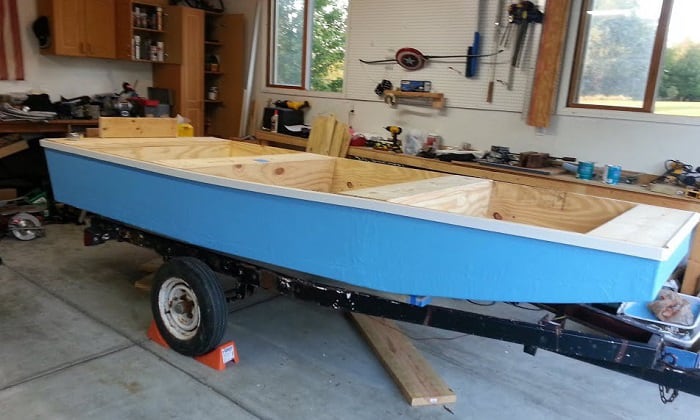
To begin, place the first plywood bottom or floor on the ground. This assumes you’ve trimmed it down to your required size (e.g. 48″ x 42″). The front boat’s offset should be measured properly. It must be at least 3 inches wide in the front.
After that, measure 24 inches away from it and place a 1-inch winch offset at that location. Draw the offset line with a flexible ruler.
Start cutting wood along the path you sketched with an electric hand saw or any other appropriate equipment. Mark the place where the rails will be installed with a pencil on both sides from the front to the initial piece of plywood. Although a 3/4-inch offset is suggested, it is acceptable to make some small changes.
Step 2: Preparing the first cleat panel and bottom rails
With a clamp, secure the rails in position while utilizing the lines you’ve made. For the interior, they should be positioned on the edge, but close to the line. Use screws to secure them, and the positions of the screws should be applied as pointers for where the glue will be sprayed later. A spacing of 6 to 8 inches between screws should be sufficient.
To indicate the rails, retrace the lengths with a pencil. Connect the second plywood to the rear and taking special care to ensure that it is the same size as the first. While placing the second plywood, keep track to the 3/4 overhang you created with the first plywood; it should be identical to the previous plywood.
On the second piece of plywood, draw the rails. The rails should allow for a 3/4 exposure where the front board for the bow will be placed later. Install screws in the second plywood similar to the same way you did in the first.
After that, you may begin working on the cleat board that connects the two pieces of plywood. Its length must be the same as the distance between the rails, and its breadth should be capable of covering both plywoods. Through the cleat board, attach the two parts together with screws.
You should now unscrew the rails. To eliminate any dust or dirt, wipe the locations where you will install them with a clean moist cloth. The glue’s adherence to the wood is also improved by dampening the gaps. After you’ve completed this step, you may begin the gluing procedure.
Step 3: Gluing and Screwing
In this step, while adding the glue, make sure it runs uninterrupted and that you don’t stray over your highlighting lines. First thing is to ensure that there are no water leaks between the rails and the plywood floor.
Afterwards, replace the rails. Since you’ll need to put them on the same screw holes you drilled previously, it’s advisable to have someone assist you. As you install the rails, wipe away any extra glue that leaks out.
Then, apply the same procedure to the cleat board you just installed. Place a wooden piece at least 4 inches thick beneath the front boat to allow it to arch. While you wait for the adhesive to dry for at least 8 hours, this will be in position.
Also, you will need to mark the location for the second cleat board by inserting a piece of wood that’s the same thickness to where you intend to place it. To stimulate the arching, softly weigh the wood down.
Step 4: Creating the Seats and Sides
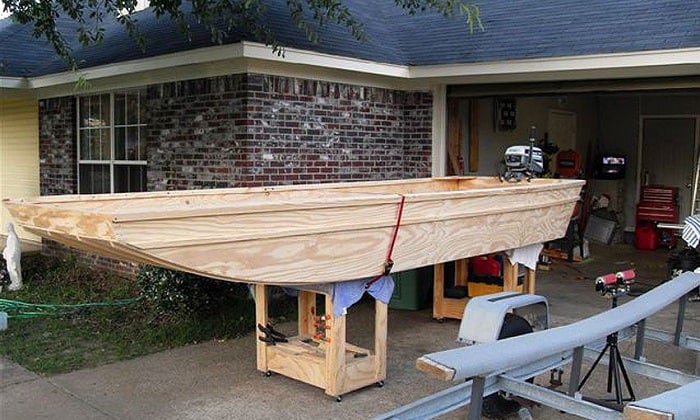
We highly suggest that the fourth step should be done in the next day, due to its complexity and time consumption. In this phase, you can use the same methods as previously: attach the second cleat to the back of the boat. When you’re done, start putting the sides upon the offsets that you have noted at the edges.
Apply the adhesive, then put the sides in place with a clamp. Remove any extra glue that foams up, just like you did before. As this is the time to make the seats, stick the upright boards that have been measured before to the sides of the backmost section of the boat. After you’ve completed that, you may paste the transom to the boards. It should span the whole width of the two sides.
The bow and prow are in the same boat. Before attaching and putting the transom in place, dry-fit it to make sure it fits well and make any required modifications. Place two cleat boards horizontally between the two other vertical cleats you established before. After that, you may install the plywood for the seat in place.
Continue working on the remaining seats using the same method of connection as before: glue, then screw. Turn the boat over and begin installing four oak (recommended) rails to protect the boat from abrasions caused by sharp pebbles or other debris encountered while boating.
Step 5: Customizing, finishing, and cleaning
From here, you may begin the rest of the modifications and finishings you wish. For instance, to improve safety and stability when riding or boarding, you can attach handles to the front and back. Spend some time sanding and cleaning the boat to remove any leftover glue foam or dust.
Tips to Keep Your Jon Boat Stable
In open water, keeping a flat bottom boat steady is not a problem, but in choppy waves, things get a bit more complex. When the weather becomes worse, stabilizing a Jon boat may be a difficult task, especially if you’re hauling a heavy cargo.
Here are some suggestions to keep your jon boat stable and prevent it from sinking:
- Construct or purchase a boat with a deeper hull. A flat bottom boat’s stability improves as it grows in size, especially while carrying large loads.
- Attach two PVC pipes with suitable measurements along both sides of your jon boat at the water level. Make sure both pipes are sealed and water cannot leak in.
- In case your boat has not had a deck, install it right away. A boat deck will increase the weight and keep your jon boat more stable.
Conclusion
Building a jon boat is certainly a joyful and rewarding process for those who have a tight budget but still wish for a memorable boating experience. We hope that the above information and guidelines on how to build a jon boat can help you construct your homemade jon boat plans appropriately without too much effort. Hence, a nice trip with your new DIY jon boat is no longer an impossible dream!
Did you enjoy the article? Do you want to add anything else? Please let me know and leave a comment below.

Ten years of enjoying countless trips on boats never made me love them any less! So I am here to put all those experiences into good use for other boaters who want to have a safe and fun trip with their friends and families.