
According to the recent legislation in Marine Safety Regulation, most watercrafts these days need to include a safety-stop lanyard, sometimes known as an engine kill switch. This device is installed within marine electrical networks to rapidly shut off propulsion in case that the boater is thrown from the boat.
However, kill switches produced by different manufacturers may appear identically. Nevertheless, the two types of kill switches do not perform the same functions in terms of electrical operation. As a result, it’s no surprise that you must install these gadgets in a different way.
If you are looking for detailed yet simple guidelines on “How to install a kill switch on a boat?”, this post is perfect for you. Not only will we compile step-by-step instructions on installing a marine kill switch, but we will also provide knowledge to answer questions related to types of boat kill switches.
Moreover, more tips and notices on dealing with a kill switch for boats in real situations are also included in this article. So, you and other sailors can practice this process without too much difficulty. Continue reading to learn more!
Table of Contents
Why Is Installing an Outboard Motor Kill Switch Important
1. What is a marine kill switch
An outboard kill switch, sometimes known as a rope, is a cut-off mechanism that operates and ‘kills’ the motor if the sailor loses control of the vessel. It is normally made out of a length of tough plastic cable with two opposing ends.
The first consists of a series of quick-release hooks that connect to the motor’s kill switch. The other end includes a karabina that clips straight into the boater’s life jacket, or it may be formed into a loop and wrapped around his leg or arm.
2. The importance of installing a boat kill switch
Regardless of the fact that the US Coast Guard has mandated the installation of a kill switch on any boat shorter than 26 feet, this device is considered a must-have by expert sailors. This part of the post will explain why you should apply a kill switch on your watercraft. Furthermore, it is necessary for boaters to pay attention to the elements below and avoid encountering accidents caused by these factors:
Hazardous obstacles
High, murky water may hide boulders, logs, and gravel bars. If the boat and the commander come into contact with these objects unexpectedly, they may get separated.
The engine turn-off switch on a vessel restrains the motor from running, enabling the boat to remain at least in the region where it is trapped.
Human mistakes
If a vessel is driven at extremely fast speeds, such as when attempting to avoid an unexpected storm, hidden threats or unanticipated waves may expel boat passengers.
Tournament bass anglers may dash to key places at 70 mph, but they recognize the need for a craft’s motor kill button and when to reduce the speed.
Enormous waves
Large waves seem to be more likely to occur in large areas of water. Even with continual forecast monitoring, the weather may shift surprisingly rapidly. A violent thunderstorm may generate rolling, unpredictable waves that seek to throw everything and everyone off the boat.
As you all have understood the essentiality of having an outboard kill switch, it’s time for us to find out how this device functions. Continue reading for more information!
How Does a Kill Switch Work
Although some people call a kill switch a kill cord, the correct term is a cut-off switch. Its primary duty is to shut down the engine in the boat’s motor or stern drive if the driver loses control of the vessel.
An accurate kill cord for the engine is an on/off switch that completes a motor’s electric circuit. When the engine is turned off, it ceases to operate. It is linked to the sailor either digitally or physically.
When the boater is relieved of control, his link to the kill switch is severed. The switch automatically shuts off, forcing the engine to turn down.
Both the propeller and the boat will cease to function. As a result, bypassing the kill switch is unnecessary. Even if you have no intention of doing so, it is possible.
Beyond the law, applying a kill switch for your boat is essential since it guarantees safety for you as well as passengers on board. Then, how to install the kill switch properly? Follow the instructions below to find out!
How to Wire a Killswitch on a Boat? – A Step-by-step Tutorial
When the skipper is flung out of the boat, the nautical generator of the maritime kill cord with a safety-stop lanyard immediately shuts down. Drivers may also lose sight of the fact that they are connected at times.
They inadvertently leave the steering platform and thus are taken aback when the motor shuts down. It can be troublesome at inconvenient times, such as while docking. As a result, a boat’s wireless kill switch was developed to avoid such incidents from occurring on a regular basis.
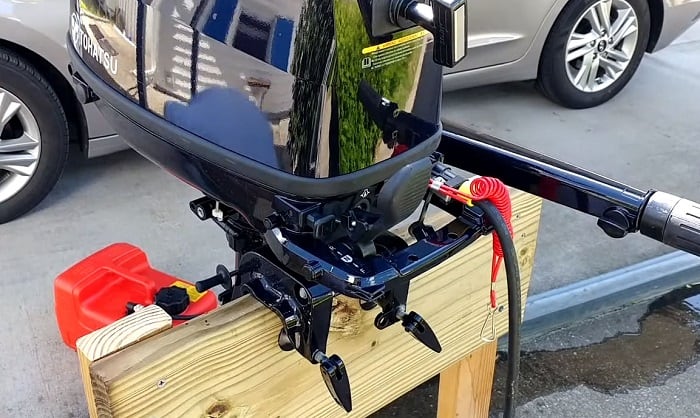
The wireless version includes an automatic controller. Even though the motor shuts off if the control carrier goes overboard or away from the vessel for 50 feet or under, an automated override feature allows it to be restarted.
This feature enables those who remain onboard to restart the motor and assist the person who falls out of the watercraft. It may take an hour or more to install this wireless trolling motor stop switch.
In order to apply the kill switch, you need to prepare some tools and equipment so that the process will be much easier. Here is a list of necessary gadgets for this procedure:
- Marine fuse tank inline (1-3 amp fuse)
- Power drill
- Hole saw (2 ⅛-inch type)
- Strippers and wire cutters
- Crimping tool
Step 1: Installing xHub
Choose the appropriate location on the wheel and drill a 21/16-inch-diameter hole. You must ensure that there is enough space for the 61/2-inch-long xHub antenna. Remove the nut before mounting the antenna to the unit’s rear.
Place the antenna as well as xHub into the hole you created. You must allow the gasket to sit in the centre of the dashboard panel & xHub while doing so. The battery indicator is located at the top of the display in this configuration.
Squeeze the xHub bolt with your own hands while connecting the five-pin connecting wire at the back of the unit.
Step 2: Power processing
Before connecting the wire to the power supply, you must cut off the onboard battery life for safety reasons. The connection cable includes a color-coded five-wire pigtail.
The positive red wires must be connected to a reliable 12V DC supply. For this, you’ll need a 1 to 3 amp fuse as well as a marine in-line fuse holder. The black wire will then be connected to the onboard ground connection.
These wires may need to be extended. You must need a 16/20 AWG wire to do this task.
Step 3: Attaching signal wires
The remaining two cables are intended to be connected to the vessel’s current kill switch. You can get a wiring diagram for your engine brand on the manufacturer’s website.
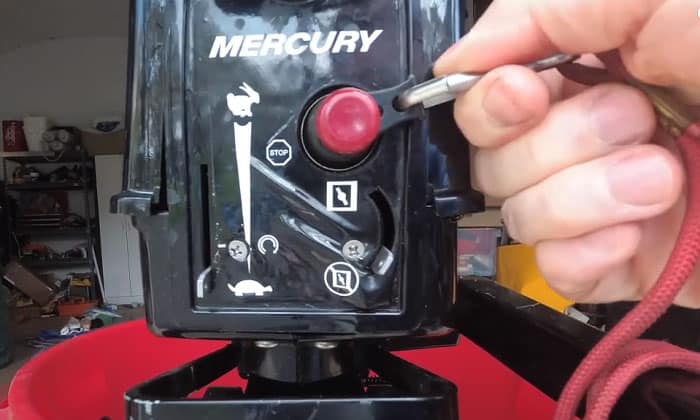
If you own a mercury kill switch, connect the gray cable from the xHub to the black/yellow wire that connects to the switch. The orange cable should be attached to the black one that is also transmitted to the switch.
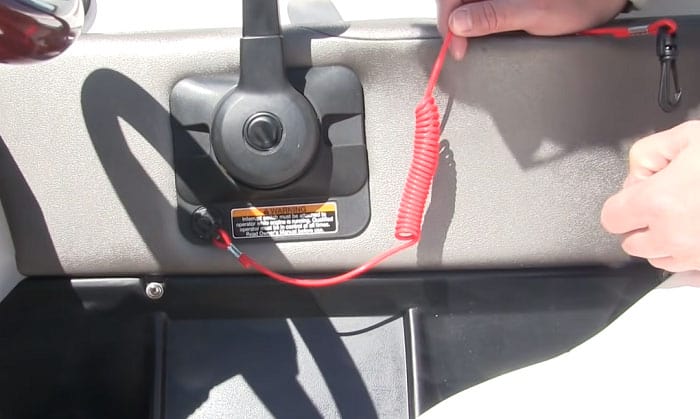
A lanyard can be used to keep the kill switch working. Remove the wires that are attached to the engine instead of disconnecting them. Simply joining them with the wireless xHub cables.
Step 4: Assessing the new system
When your vessel is docked, you may begin to assess the system. If the cables are connected to the current kill switch, start the motor. To ensure that it still works, attach the lanyard to the engine and restart it.
You leave your watercraft or swim in the water to test whether the motor shuts down. A red light, as well as a sound indication, will be activated. In real life, they will be an indicator that a person has fallen overboard.
The wireless kill switch’s automated feature can rejoin in as little as six seconds. Of course, you can turn off the engine by pressing a button on the remote.
Conclusion
In fact, applying a kill switch is not an easy task, yet it is crucial for any boater to understand this process firmly so that they can apply it in real situations. By practicing attaching and utilizing a boat kill switch frequently, it is only a matter of time for you to get used to and improve the safety for you and passengers onboard.
Hence, we hope that the above information and tips can help you solve all your confusion about installing a kill switch for boats so that performing this task will be just a piece of cake.
Did you enjoy the article on how to install a kill switch on a boat? Do you want to add anything else? Please let me know and leave a comment below.

Ten years of enjoying countless trips on boats never made me love them any less! So I am here to put all those experiences into good use for other boaters who want to have a safe and fun trip with their friends and families.