You bought an old boat and the name decals applied by the previous owner are in terrible condition, or your new vessel has just arrived and you want to remove boat registration stickers.
Those issues above are just two of many cases requiring boaters to work on boat decal removal, which may cause much trouble.
Since we understand the difficulties that some boat owners may encounter while removing boat decals, this article is here in an attempt to provide solutions for those problems by answering the question: “How to remove boat decals?”
Whether you are removing boat stickers from fiberglass boat surfaces or getting rid of old vinyl decals from Gelcoat boat covers, this post will present the best way to deal with all tasks related to marine decal removal. Let’s start with the first method!
Table of Contents
Method #1: Using an Eraser Wheel
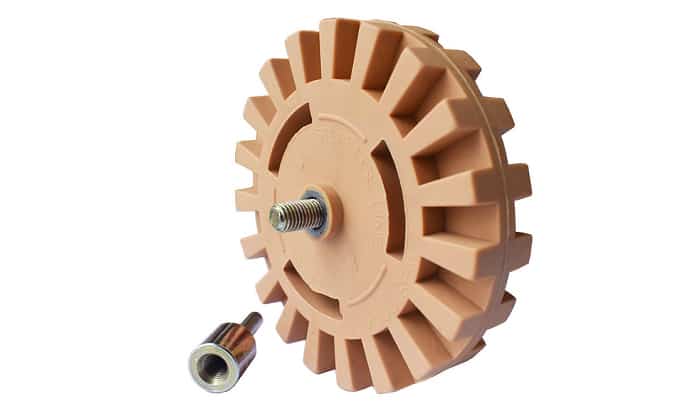
One of the best ways to remove decals from boat surfaces is to use an eraser wheel. So, what is an eraser wheel, and how does this device work?
An eraser wheel functions similarly to a pencil eraser, but it can erase a larger surface area and is ideal for boat decal removal. To use this tool, you can simply connect it to the adapter. After that, you attach all these components to your regular drill, and you’re good to go.
Essential tools
Here is the list of what you need to prepare for this method:
- Eraser wheel
- Adapter
- Household drill (read the manufacturer’s instructions to know which drill is suitable with your eraser wheel)
- Clean rags or solvents like Goo Gone or Sticker Off
Now that you have enough tools, it’s time for us to start the removal process. Follow these below steps to eliminate old decals from your boat’s cover.
Step 1: Remove decals with the eraser wheel
- Firstly, you read the eraser wheel’s instructions to attach them with an adapter and a drill.
- After connecting those components, run the drill and bring it to the area where you want to remove the stickers or decals.
- Then, you will softly sand over all the decals and rub them right off like the way you use a pencil eraser.
This procedure will require a lot of patience, so make sure you have plenty of time if you choose this technique.
Step 2: Erase the remaining adhesive residue
After sanding over the boat with an eraser wheel, some adhesive residue will remain in the spot where the decals were, making your vessel feel sticky and making it harder to apply new graphics in the same location.
Hence, it is necessary to clean off this residue. To do so, spray some Sticker Off or Goo Gone liquid on the adhesive residue area. Then, use a clean rag to rub off all those sticky spots.
Many people believe that using an eraser wheel will be the best way to remove decals from aluminum boat covers, especially when you have a fairly large area to clear.
This is because an eraser wheel is not expensive and causes little damage to the vessel’s surface, so it may be worth having one.
Method #2: Using a Heat Gun
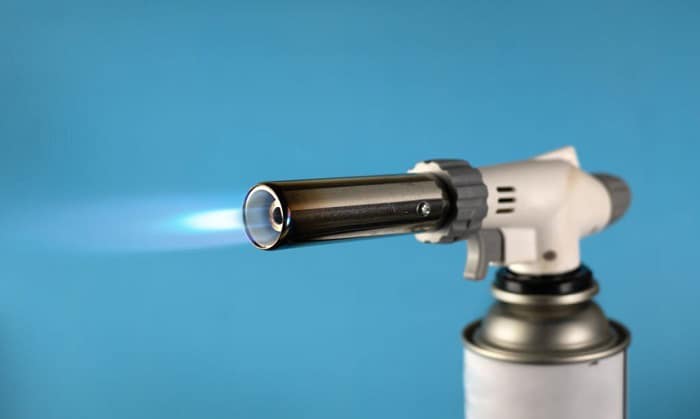
The most common technique for removing old boat decals is by applying heat to the stickers or vinyl decals. There will be two ways to practice the heat effect on the decal surface, and in this part of the post, we will discover the one using a heat gun.
For this method, all you need to prepare is a heat gun and a pair of gloves. If you don’t have a heat gun, a hairdryer will be an excellent alternative.
This is a step-by-step tutorial on how to use a heat gun to remove boat decals.
Step 1: Melt the decals or stickers with a heat gun
- Activate the heat gun and bring it closer to the vinyl decals but don’t let the gun touch them directly.
- Move the heat gun up and down, side to side until the decals become softer and more pliable.
- The ideal way would be to move the gun over the decals repeatedly. Placing the heat in just one spot can easily burn the gelcoat of your watercraft.
Step 2: Take off the decals
After heating the decals with the heat gun, it will be much easier for you to peel them off the boat’s surface.
- First, lift one to two edges of the softened decals using a sharp tool, such as a razor, plastic scrapers, or even the tips of your nails.
- Try your best not to damage the vessel’s gel coat and paint covers. If you can’t peel off the decal’s edges, applying more heat to the spot will do the work.
- When the vinyl decals start to loosen, you can now freely remove them from the craft’s cover.
- Move the razor from top to bottom to fully take off the decals. Also, as you remove the vinyl decal from the vessel, maintain the heat by moving the gun around it.
Step 3: Erase the remaining adhesive residue
With this step, you can apply the same technique used in the first method. Spray an amount of Sticker Off or Goo Gone liquid onto the residue area. Then, use a clean cloth to wipe it off.
Solvents like Sticker Off or Goo Gone are still effective in removing remaining adhesive residue, even on difficult surfaces like those from aluminum boat covers.
Still, some people prefer acetone and mineral spirits. However, acetone must be cleaned off as soon as possible, or else it can harm your boat’s gel paint immediately.
Hence, if you choose to stick with acetone, remember to keep a wet cloth by your side when you apply this liquid onto your vessel.
Method #3: Using a High-pressure Washer With Hot Water
The second technique of applying heat to remove boat decals is to use a high-pressure washer with hot water. Even though this boat decal remover is less popular than the two previous methods, it still brings maximum effects and even works better with large decals.
Since this method requires you to have a pressure washer that can sustain hot water, it isn’t widely chosen by many people.
Apart from being costly to own, a high-pressure water jet may cause damage to thin-skinned vessels. On the other hand, this device proves to excellently remove most of the decals on aluminum boat covers.
Necessary equipment
So, if you are an aluminum craft owner, this technique is made for you. Here is the list of necessary tools for the boat decal removal process:
- A high-pressure washer
- Hot water
- Solvents
- Clean rag
Step 1: Activate the high-pressure washer
- Heat the water before use
- Turn on your high-pressure water jet and fill the water tank with hot water
Step 2: Remove boat decals and stickers
- Set your washer at a low setting and start to spray the decals to melt them.
- If the current setting isn’t strong enough, progressively raise the power until the decals can be peeled away from the surface.
- Sprat the decals once again to remove any remaining adhesive, then turn off the high-pressure water jet.
Step 3: Erase the remaining adhesive residue and dry your boat
- You can use the same techniques mentioned in the same step as in the previous methods.
- After applying solvents and wiping out sticky residues, run the high-pressure washer once again and give your boat a final rinse to eliminate the remaining solvent.
- Then, blot out the exterior of the watercraft and leave it outside to air dry.
These are the three most effective methods we recommend to boaters to remove old boat decals and restore the beautiful outlook on their vessels. Once you get this task done, just feel free to apply your favorite graphics onto the boat cover and refurbish your old craft.
Conclusion
How to remove boat decals? Depending on the amount of decal needed to be removed and the type of vessel, you can choose the best way to apply it to your boat’s surface.
Still, regardless of the three methods mentioned in the article or other techniques, please remember to use the right tools and solvents along with practicing safety precautions to ensure the effectiveness of the boat decal removal.
We hope that this post was helpful! Did you enjoy the article? Do you want to add anything else? Please let us know and leave a comment below.

Ten years of enjoying countless trips on boats never made me love them any less! So I am here to put all those experiences into good use for other boaters who want to have a safe and fun trip with their friends and families.


