

Maintaining the quality of the outboard motor is essential if boaters want their vessel to run smoothly during boating seasons. Winterizing the outboard boat motor will help you to avoid damage from disuse in the long winter and insure that your engine is ready to go.
In this article, I will show you useful guidelines on how to winterize an outboard boat motor while storing your craft in the off-season, along with a list of required tools and materials that you can take to winterize boat motors.
There is also certain knowledge on the essence of winterizing outboard motors, which helps you to understand why this action is necessary. Therefore, stay tuned!
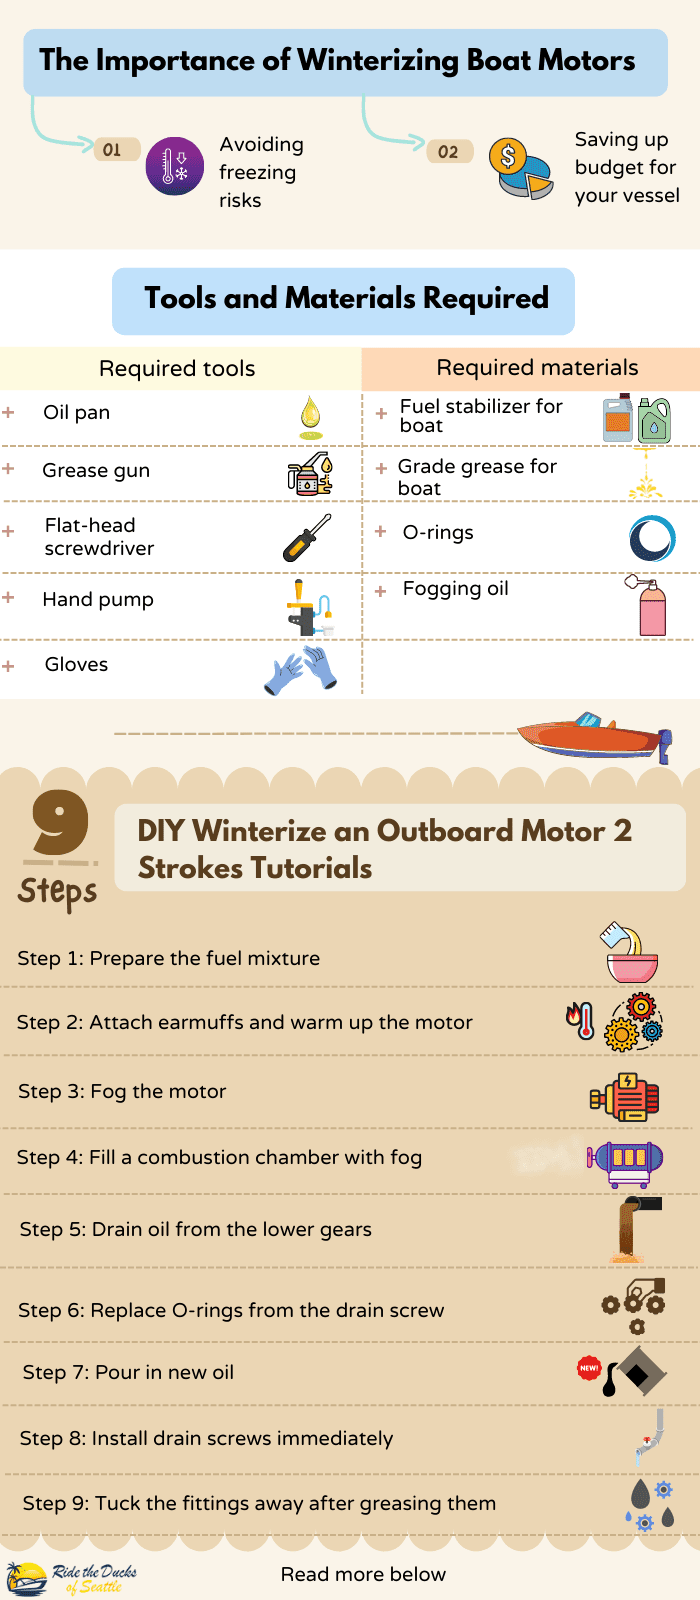
Table of Contents
- The Importance of Winterizing Boat Motors
- List of Tools and Materials Required
- DIY Winterize an Outboard Motor 2 Strokes Tutorials
- Step 1: Prepare the fuel mixture
- Step 2: Attach earmuffs and warm up the motor
- Step 3: Fog the motor
- Step 4: Fill a combustion chamber with fog
- Step 5: Drain oil from the lower gears
- Step 6: Replace O-rings from the drain screw
- Step 7: Pour in new oil
- Step 8: Install drain screws immediately
- Step 9: Tuck the fittings away after greasing them
- Conclusion
The Importance of Winterizing Boat Motors
At its most basic level, winterizing is removing water aboard and refilling it with enough antifreeze to protect your boat from the coldest temperatures. The colder the water, the more it expands in volume. This expansion can create major cracks in the boat’s motors.
Therefore, the main purpose when you winterize your boat motors is to prevent these parts from being freezed and damaged by cold water and dust. The following statements are reasons why you should put your craft’s engine to bed properly during winter.
1. Avoiding freezing risks
Normally, you may operate your outboard in the water. However, if you leave your engine under the frozen water, it will be damaged. You should not abandon your prop in the water since it will wear away the anodes, but it is more harmful under extreme cold weather.
Engines that are tilted up and upright cannot drain all of the water from jackets. So, if there’s a chance of freezing, assess the engine and, if it can’t be drained in place, remove it from the boat to drain.
2. Saving up budget for your vessel
The majority of insurance claims are for cracks in the fuel tank or exhaust pipes caused by water remaining in the cooler after a strong freeze. All too frequently, the only option is to replace the entire engine.
Water is also held in water holding tanks, bilge pumps, and engine pumps. One cold night and a little liquid within any of those pieces is all it takes to cause significant harm. Adding everything together, you’ll have enough financial motivations to winterize boat motors.
List of Tools and Materials Required
Winterizing boat motors is certainly not an easy job. Before working on this task, you need to prepare particular tools and materials. Still, since there are different types of boats and motors, I will only focus on supplies for the most famous engine – 2-stroke outboard motors.
1. Required tools
- Oil pan
- Grease gun
- Flat-head screwdriver
- Hand pump
- Gloves
2. Required materials
- Fuel stabilizer for boat
- Grade grease for boat
- O-rings
- Fogging oil
DIY Winterize an Outboard Motor 2 Strokes Tutorials

In this part of the article, I will provide detailed yet homemade tutorials on how to winterize an outboard motor 2 strokes for your boat in 9 steps. These instructions are extremely simple and only take you 20 minutes to practice and have your craft prepared for off-seasons.
Step 1: Prepare the fuel mixture
To protect the mixture from turning bad throughout the winter, use the marine gas stabilizer. One ounce of stabilizer will be able to mix ten gallons. After pouring the right measurement of stabilizer into your tank, you should slosh the tank to mix everything up.
Also, notice that it will be fine if you add a bit of extra stabilizer than the recipe calls for, so relax when you mistakenly utilize more stabilizer than usual.
Step 2: Attach earmuffs and warm up the motor
In the second step, connect a hose to the ports intaking water on the lower end of the device and connect a set of flush muffs to them. Then, start the engine and turn on the water.
You should allow the engine to warm up for five minutes before applying the stabilized gas mix to the whole engine.
This is also a great opportunity to inspect the impeller’s performance. If the impeller is spewing out water, it is performing its job; if there is no liquid spilled out, it has to be replaced as soon as possible.
Step 3: Fog the motor
The third step starts by removing the engine cover and looking for the air intake port on the carburetor. After that, you spray a thin coating of fogging oil into the port while the engine is working.
The engine will attempt to die, but by increasing the throttle, you can keep it going.
Fog the motor until it shuts down. Do not panic if you see white smoke coming out from the intake, as that happens when you are following the correct process.
Step 4: Fill a combustion chamber with fog
In this step, you need to detach the spark plug boots and unscrew them. Then, replace the plugs if their contacts are rusted and spritz little fogging oil within the chamber if their contacts are rusted; otherwise, use the old ones.
Stroke the starting cord several times to cover the piston as well as the cylinder with fogging oil while the plugs are still in position and their boots are removed.
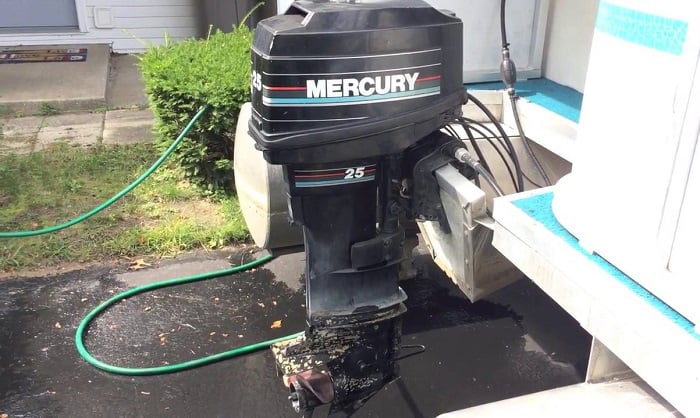
Step 5: Drain oil from the lower gears
Withdraw the bottom drain lid screw, then the upper screw, and allow the engine oil to flush freely.
Step 6: Replace O-rings from the drain screw
Remove the old O-rings inside the drain screws and replace them with new ones. This will guarantee that the seal is strong.
Step 7: Pour in new oil
In this stage, you connect a quart of boat grade gear oil to a pump handle. The pump’s other end will go into the bottom drain port. Fill that bottom end with fresh oil until you observe oil draining from the higher drain port.
Step 8: Install drain screws immediately
To begin the eighth step, tighten the top drain screw; this will stop the fresh oil from leaking out as rapidly. Then, immediately screw in the bottom drain screw after withdrawing the pump from the bottom drain port. It’s fine if some oil is lost.
Step 9: Tuck the fittings away after greasing them
In this final step, you need to grease all of the motor’s fittings. The motor has a lubricant nipple near the mounting bracket and another one within the engine cover. In order to prevent the engine from breaking down while running on the water, pump in marine grease.
After your vessel has been lubricated, store it in a secure area until next season.
Conclusion
It is not a pleasure experience to deal with a freezing motor that will cost you a fortune to fix and replace. By following these instructions, you can easily winterize your craft’s outboard motors with only minimum effort and avoid unwanted incidents. Still, my best advice is to choose a suitable type of grease for your boat like this package of Marine Grease.
Did you enjoy the article on how to winterize an outboard boat motor? Do you want to add anything else? Please let me know and leave a comment below.
Read more: Is fogging a boat motor necessary?

I am passionate about water sports and technical fields, so combining both makes me interested in making contents about boat accessories. With my partner, we went on many trips and sports games together, which led us to think about how we can spread our joys and passions to many people.