
You may have a circuit breaker from Minn Kota because you like that it’s a trusted brand. But the necessary work doesn’t end after you find the right equipment. You must also finish the Minn Kota circuit breaker installation. To obtain protection for your boat motor, you have to assemble the parts properly.
Besides availing protection, adding a circuit breaker is a requirement imposed by ABYC or American Boat & Yacht Council for the sake of safety. Also, the Coast Guard dictates that users must be able to manually test their breaker or fuse. It should be trip-free and appropriate for your trolling motor. To keep up with these regulations and guarantee your safety, let this article guide you with the installation.
Table of Contents
Guide on the Components of Minn Kota Circuit Breaker
Before you start the installation of the Minn Kota trolling motor circuit breaker, you have to make sure that you have the proper equipment for your boat. Double-check the following components:
1. Different Sizing of Circuit Breaker and Conductor Gauge
Before you go over the sizing chart, you have to keep these things in mind.
- Only two conductors are allowed to be paired together inside a conduit or sheath of the engine space.
- The appropriate temperature for insulation is 105 degrees Celsius.
- When the motor power is set to its full capacity, the voltage drop shouldn’t be below 5%.
| Motor Model | Maximum Amp Draw | Circuit Breaker | Wire
(AWG) |
Extension
(AWG) |
Length
(AWG) |
(AWG) | (AWG) |
| 5’ | 10’ | 15’ | 20’ | 25’ | |||
| 30 lb | 30 | 50 amp at 12 VDC | 10 | 10 | 8 | 6 | 6 |
| 40 lb, 45 lb | 42 | 50 amp at 12 VDC | 10 | 8 | 6 | 4 | 4 |
| 50 lb, 55 lb | 50 | 60 amp at 12 VDC | 8 | 6 | 4 | 2 | 2 |
| 70 lb | 42 | 50 amp at 24 VDC | 10 | 10 | 8 | 8 | 6 |
| 80 lb | 56 | 60 amp at 24 VDC | 8 | 8 | 8
|
6 | 6 |
| 101 lb | 46 | 50 amp at 36 VDC | 8 | 8 | 8 | 8 | 8 |
| Engine Mount 101 | 50 | 60 amp at 36 VDC | 8 | 8 | 8
|
8 | 8 |
| 112 lb | 52 | 60 amp at 36 VDC | 8 | 8 | 8 | 8 | 8 |
| Engine Mount 160 | 116 | 2 pcs of 60 amp at 24 VDC | 6 | 6 | 4 | 2 | 2 |
| E-Drive | 40 | 50 amp at 48 VDC | 10 | 10 | 10 | 10 | 10 |
| Talon Shallow Water Anchor | 30 | 50 amp at 12 VDC | 10 | 10 | 8 | 6 | 4 |
| Raptor Shallow Anchor | 70 | 50 amp at 12 VDC | 10 | 8 | 6 | 4 | 4 |
The wire size or extension length is the distance between the trolling motor and the batteries.
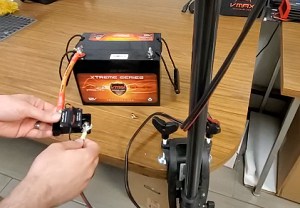
2. The Right Battery
Minn Kota produces circuit breakers for their trolling motors. It’s an effort to achieve the expected result. Nevertheless, the battery contributes to making things work. A trolling motor from Minn Kota can operate with 12V deep-cycle marine batteries composed of lead acid. The best one to choose is the one with an hourly rating of 100 amperes. You may have this as a reference when wiring Minn Kota trolling motor.
| Run-time | Voltage | Group Size | Amp-hour |
| Best | 12 | 31 | 95 to 125 |
| Better | 12 | 27 | 85 to 110 |
| Good | 12 | 24 | 70 to 85 |
Additional Tips When Getting Batteries for Your Trolling Motor
- Never connect the signs (-) and (+) even though they’re similar batteries. See to it that no metal objects contact the battery and cause a short circuit. It’s hazardous because it can create fire.
- Store the batteries properly and keep them in full charge. Premature failure can happen if you don’t recharge then within 12 to 24 hours. Minn Kota also offers chargers in different volts like Minn Kota Precision On-board Charger.
- Get separate batteries for your Minn Kota trolling motor when you have a crank battery on your outboard motor.
Precautions
- Let the boat get into the water before starting the propeller. When working on the lead wire plug, be careful with the right polarity and follow instructions from the manual.
- You have to detach the batteries when they’re being charged and the motor is not used.
- Battery explosion occurs when there’s wrong wiring of systems 24V, 36V, and 48V.
- The connections of the battery post with the terminals should be tight.
- Always do the installation of batteries in a ventilated area.
Installation Guide
Trolling motor circuit breaker installation starts with making sure that you have the necessary parts. You’d prefer to continue working rather than pause to find what you need. The Minn Kota wiring system mainly includes the following:
- Trolling motor and control together with remote control, hand tiller, and foot pedal
- Electrical leads and connectors for terminals of battering ring (5 ft)
Apart from these components from the Minn Kota wiring kit, you will need these:
- Batteries – You’ll need two to three, depending on the voltage of your trolling motor. Refer to the exact quantity with the battery chart above.
- Terminal ends – You can get these or other kinds of battery connectors. They will be attached to terminal ends so you can connect them to the batteries. These terminal ends are situated on the motor’s electrical leads.
- Battery charger – You need this to recharge your batteries after every use.
- Jumper wire – Only the short wire is required for a 36V or 24V trolling motor. This is attached to the series of motor batteries. You may refer to the wiring diagram to confirm if you need a wire gauge for the trolling system.
Don’t be impatient if I tell you that you may need to get additional parts. Once you’re done with the correct installation, there’s an assurance that your trolling motor is protected. The exchange for hard work is beneficial in the long run.
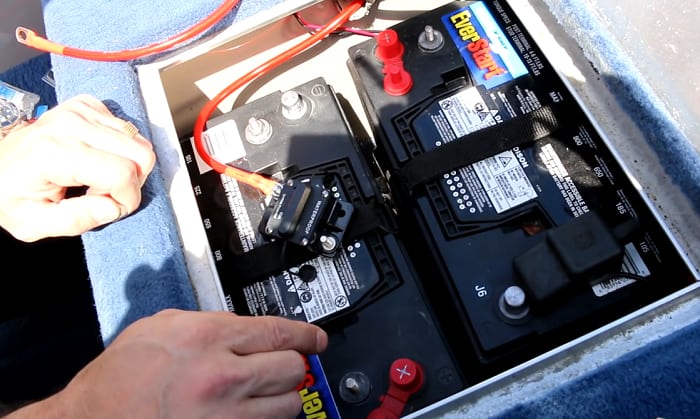
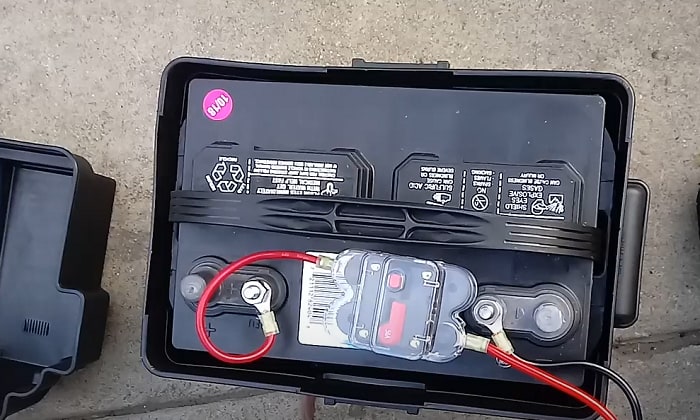
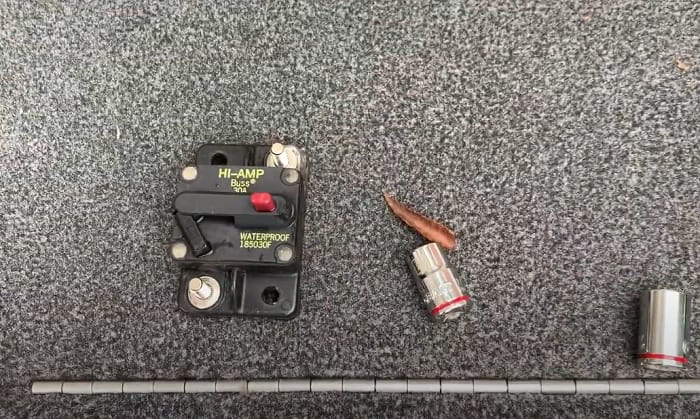
- Circuit breaker – This is the star of this article as it protects your trolling motor if the propeller is being pressured when it gets stuck underwater.
- Motor plug and receptacle – With these tools, it’s fine to quickly disconnect the wiring of the trolling motor. It’s helpful during charging.
- Quick-release plate – It comes in handy when you need to temporarily remove the mounted trolling motor. You’ll likely do it during storage, trailering, family days, service, and putting on boat cover.
- Extension wiring – You may need this to reach out for the batteries as there’s usually 3ft to 5ft electrical leads of trolling motors. Check the length that you need in the first chart above.
- Speed switch – You can avail Minn Kota 5-speed switch for your trolling motor. It will save you from spending on fixing or replacing your motor.
After a long way, the installation is discussed in this part. First, it’s with the trolling motor and batteries. Check the positive and negative sides of the battery so you can attach the leads properly. The black part is positive and the negative side is red.
The 12V trolling motor usually weighs 22 lbs or less and should be linked with the positive terminal while the lead is on the negative side. 24 volt and 36-volt trolling motors need a series of batteries. After this step, here are the installation procedures of a circuit breaker from Minn Kota.
- Turn off the main panel, which must be free from any live wires. It’s safe to open once the main panel is off. But just to be sure, test the wires that you will touch with an electrical tester. No electric current should be present. You have to think of your safety before getting started.
- Loosen the screw at the bottom of the circuit breaker. The black wire should be under the screw, which needs to be tightened. Furthermore, ensure that the wire is in the right place. The wires on the appropriate circuit breaker for your trolling motor can be based on the guide charts above.
- The circuit breaker should be settled on the circuit panel.
Last Words
The Minn Kota circuit breaker installation is not only about the proper steps. You have to be careful in choosing the type of breaker, wires, and other components. These things should be compatible with your trolling motor. If they’re not the right ones, you’ll fail to make the circuit breaker work in protecting the trolling motor.

Ten years of enjoying countless trips on boats never made me love them any less! So I am here to put all those experiences into good use for other boaters who want to have a safe and fun trip with their friends and families.