
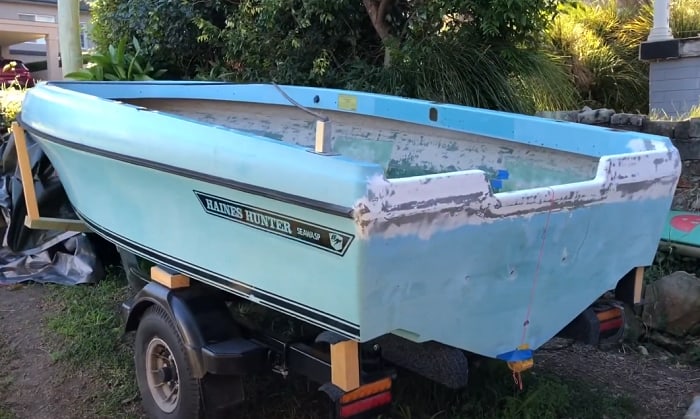
One of your responsibilities as a boat owner is to ensure the transom stays tough because it supports the engine or motor that makes your boat work. But contact with water can cause wood to rot after a while.
Fiberglassing the transom is the ideal solution. So how to reinforce a fiberglass boat transom?
You will need plywood, paint, and some tools for the process. You must also make a template to create the perfect fit. Continue reading this guide to reinforce the fiberglass transom.
Table of Contents
Why Do You Need to Reinforce a Fiberglass Transom?

- A fiberglass boat doesn’t flex or bend. So, it cracks when there’s stress coming from the pressure of fenders, bending loads, and waves.
- Since the transom on a fiberglass boat is always exposed to standing water situated in the bilge, it has a higher chance to crack compared to the parts with a little water or none at all.
- The fiberglass transom weakens when it gets old and brittle so the need to fix it is inevitable.
- Although the fiberglass bilges and hulls are not prone to corrosion, the transom is susceptible to rusting. You can blame the stainless steel bracket for this too. Despite the gel coat covering, there’s no way to avoid water intrusion and surface deterioration.
- The wooden core of the fiberglass transom can rot over time.
- If the transom of the fiberglass boat has cutouts and roughness, it can cause drag on the hull.
- The fiberglass transom is almost square so there are unsupported parts that will likely deform or crack.
Detailed Guide on Reinforcing a Fiberglass Boat Transom
To reinforce a boat transom, collect these necessary things first.
- Marine plywood (half-inch thick)
- A jigsaw
- Circular saw
- A set of a sanding machine and discs
- A drill and bits
- Acrylic epoxy paint
- Repair epoxy (two parts)
- Gel coat
- Fiberglass
- A roller and paint brushes
- A screwdriver and screws
- Hammer
- Caulking gun
- Measuring tape
- Chisel (3/4”)
Procedures
Reinforcing a fiberglass boat transom is labor-intensive. It can take a couple of days or even months to finish. Still, everybody does it to keep their vessels in shape.
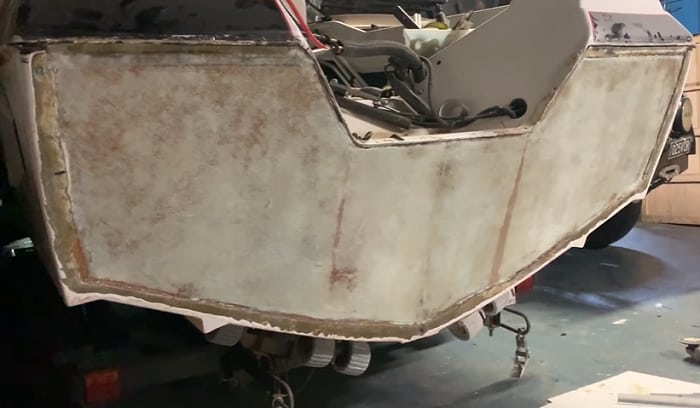
- You have to remove the old transom on a stable platform. If there’s an outboard motor, you’re obliged to take off the existing pieces of equipment. After you remove the transom, don’t throw the parts away as you may need them for reference. Measuring for the boat transom reinforcement plate is essential too.
- After the removal of the old transom, you have to do the cleaning. Because of the boat’s various designs, you may need a tool to cut through the external skin of the fiberglass. The chisel and hammer can help with this task but you have to be careful not to damage the surface.
- Once you uncover the core, you can take off the plywood. Some pieces will get stuck so take them out with a chisel and hammer.
- If the plywood is not rotten, remove the epoxy residue with a solvent or acetone. Then, strengthen the surface with these marine sealers.
- You have to move onto the transom reinforcement plate after dealing with the core. Use the transom as the basis of the template for new pieces of plywood. You won’t make mistakes once you have the template for exact fitting.
- In this part, you have to work with door skin plywood and a glue gun. Cut the door skin based on the length of the part that needs replacement. The hot glue will bind the parts together to form a makeshift outline or frame. You’ll be able to get the precise size of the transom. This enables an even coverage.
- Based on the makeshift frame, cut the plywood and check if it fits the transom. Do it before applying epoxy clear resin like Clear Table Top. There are two ways to do it: attach the whole structure or do it by piece. If you choose the latter, you need a sander.
- A sander has several purposes. It can take care of the sharp edges of the plywood for the right fit and as preparation for epoxy application. It can make the transom rough so the epoxy can adhere properly. The unthickened epoxy should be applied on the exterior of the transom.
- The finishing touch still involves epoxy; you have to fill in the gaps. Sand the excess epoxy on the edges so you don’t need to revive the fiberglass skin. The plywood shouldn’t be carried to the edge of the transom.
The holes for screws should be drilled before you set the fiberglass skin.
Apply the epoxy to the plywood and flatten the fiberglass on the surface with the help of a paint roller.
Then, you have to apply the epoxy to the fiberglass. Make sure you discard bubbles before the resin dries.
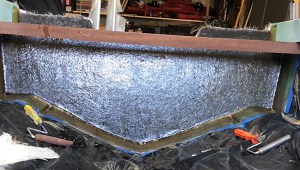
How many layers of fiberglass for the boat transom? You have to put 3 or 4 layers since the transom’s opening is smaller than the core.
Before you put the succeeding layer, let the epoxy dry. You don’t want a weak transom. Use a clamp to press the plywood after you add it to ensure adherence.
Sanding is needed to create an even surface, and this process should be done on the edges too. When the fiberglass layers are cured, you can put putty in the gaps. Sand once more before applying the gel coat. It’s also good if you cover it with acrylic paint.
Summary
The steps on how to reinforce a fiberglass boat transom are easy to follow. You’ll only need to be patient and willing to dedicate time to making templates, sanding, and curing. You have to be thorough so every part holds well. Ensuring the sturdiness will assure that you won’t have to fix anything soon. You’ll be satisfied with the result if you keep these things in mind.

Ten years of enjoying countless trips on boats never made me love them any less! So I am here to put all those experiences into good use for other boaters who want to have a safe and fun trip with their friends and families.