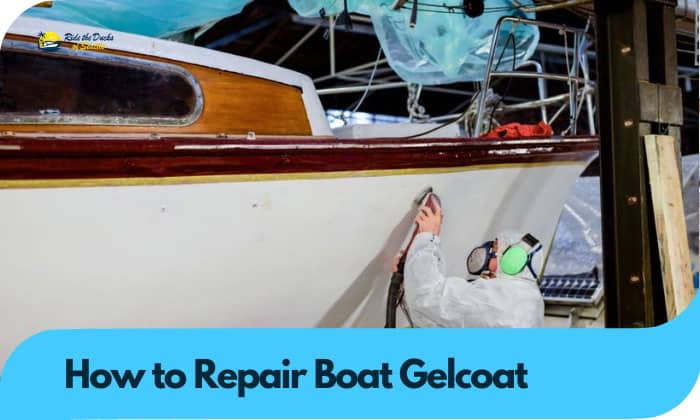
Fiberglass boats look more “polished” than aluminum variants because they have a gelcoat finish. Unfortunately, collisions, impacts, and other “accidents” can damage this protective layer. Addressing this issue isn’t a problem if you know how to repair boat gelcoat.
Worry no more! Repairing gelcoat cracks and chips can be straightforward and economical, even with limited knowledge. We will share the steps for patching fiberglass boat units and restoring them like new ones. Let’s start.
Table of Contents
Step-by-step to Repair Boat Gelcoat
Step 1. Prepare
Doing a DIY gelcoat repair is easier than some think. However, boaters must assess the extent of the damage to determine if a professional solution is more appropriate.
For example, extensive damage usually requires a large gelcoat repair that only qualified professionals can execute. Moreover, we recommend assessing for the following signs needing a professional solution.
- Series of cracks near a stanchion, cleat, or other load-bearing components
- Extensive damage on a multitone surface
- Cracks at the deck or cabin intersections or joints
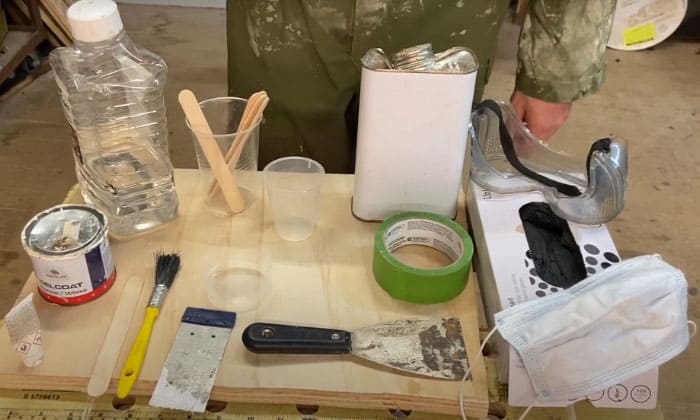
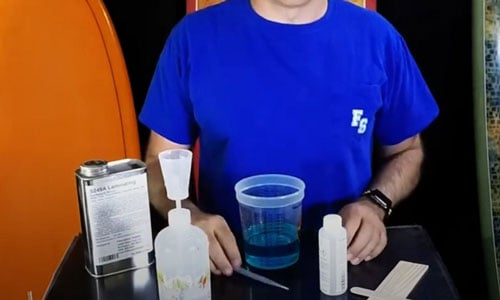
These signs of damage might require a marine surveyor to assess the problem. Otherwise, you can fix gelcoat on a boat if the concerns are superficial. The following materials are essential for this.
- Gelcoat resin and hardener
- Hull cleaner
- Mylar paper
- PPE
- Grinder (or 80-, 150-, 220-, and 240-grit sandpaper)
- Acetone
- Syringe or any gelcoat/hardener measuring tool
- Mixing container
- Stick
- Rags
- Painter’s tape
A gel coat repair kit for boats is an excellent alternative for many of these tools.
Step 2. Choose the correct gelcoat
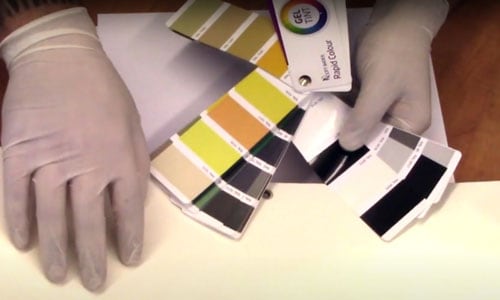
Color matching the gelcoat to the watercraft’s existing hue is essential. Otherwise, you might end up with patchy work instead of a super-smooth gel coat touch up.
In this regard, watercraft with a white gelcoat is never an issue because you can get a white gelcoat repair kit and never worry about matching the color. On the other hand, colored vessels require spot-on color identification.
- Contact the boat dealer for the watercraft’s precise color code. For example, red has a Hex code of #FF0000, maroon is #800000, and yellow is #FFFF00.
- Choose a gelcoat replacement company specializing in pigments, especially if your boat’s finish has faded. You can add these products to the gelcoat resin to achieve the desired color.
Step 3. Prepare the damaged gelcoat
A successful fiberglass gelcoat repair requires a smooth surface for the resin to adhere and create a seamless continuity across the hull.
- Clean the area that needs fixing with a hull cleaner.
- Smoothen the damaged gelcoat edges with a rotary grinder, ensuring a 45-degree angle to create space for the resin.
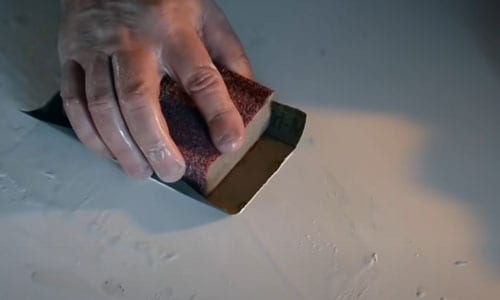
Sanding gelcoat surfaces is a worthwhile alternative, especially with minor surface imperfections. In this case, smooth out the damage with 80-, 150-, and 240-grit sandpaper.
- Use a scraper to peel old sealant and chipped surfaces.
- Moisten a cleaning rag and wipe it against the smoothened gelcoat surface. This action removes any sanding or grinding debris.
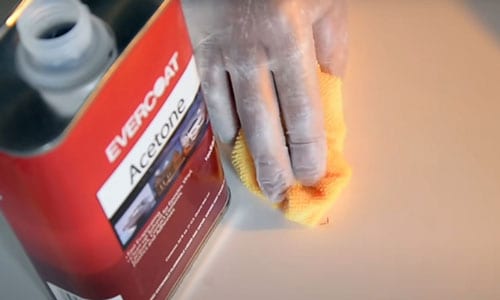
- Dampen a clean rag with acetone and wipe it across the surface for a more thorough cleaning. Acetone also dries quicker than water, readying the surface for gelcoat restoration.
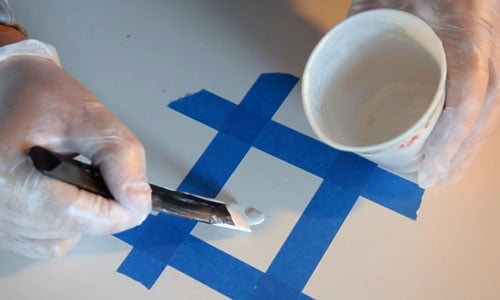
- Surround the damaged section with painter’s tape to avoid placing gelcoat on adjacent areas.
- Clean the area again with acetone.
Step 4. Prepare the gelcoat
We recommend reading the gelcoat resin manufacturer’s instructions on the correct mixing ratio of resin and hardener, including its application. For example, some brands require four drops of hardener for every teaspoon of gelcoat resin.
- Get a large syringe and draw the recommended amount of gelcoat resin to repair gelcoat gouge, crack, or scratch.
- Push the syringe plunger to release the resin into a mixing container.
- Repeat for the hardener, ensuring you draw only the precise amount. Note that deep scratches might need more resin/hardener mixture.
- Thoroughly the resin and hardener (or catalyst) using a paint stick, ensuring consistency.
Pro Tip: Prepare smaller gelcoat resin batches instead of large ones to minimize waste due to quick curing (or hardening).
Step 5. Apply the gelcoat/hardener mixture onto the boat’s hull
You’re now ready to repair cracks in gelcoat surfaces. Most boaters use a gelcoat sprayer for this procedure, while others utilize a paintbrush. A paint stick is also a good alternative, especially with a small-area boat hull gelcoat repair.
- Hold the mixing cup containing the prepared gelcoat mixture in one hand and grab a paint stick or brush with the other.
- Dip the brush or stick into the gelcoat mixture.
- Apply the gelcoat on the damaged surface. It’s okay to use a heavy or thick coat.
- Cover the new gelcoat with Mylar paper to speed up the curing process and improve after-gelcoat smoothening.
- Monitor the gelcoat’s curing process. You want the boat clear coat repair substrate to be dry but slightly tacky.
- Apply a second (or third) gelcoat layer if necessary. However, one thick coat is usually sufficient, especially with Mylar paper.
- Leave the gelcoat to dry and harden completely.
Step 6. Complete the project
You’re nearly complete with the gelcoat damage repair. You can perform this step on the same day as the gelcoat application, especially on hot days. However, most boaters schedule this step the following day to ensure proper gelcoat curing.
- Peel off the Mylar paper from the surface.
- Use a 220-grit sandpaper to smoothen the gelcoat. To reduce manual labor, you can rely on an orbital sander.
- Run your fingers across the gelcoat surface, ensuring no bumps, creases, or grooves exist.
Here’s an informative video on how to repair a watercraft’s damaged gel coat surface.
FAQs
Common causes of gelcoat damage
Hitting the dock, fishing gear banging against the hull, and dropping beer or wine bottles on the deck are common causes of gelcoat damage. However, other factors are possible, including the following.
- Flexing due to stress, aging, or mold growth underneath the gelcoat layer
- Hairline or screw hole cracks due to sheet metal or self-tapping screws
- Failure to use a pilot hole for screws
- Overloading and extremely rough waters can stress the section between the deck and the cabin, producing multiple cracks
Common mistakes to avoid during gelcoat repair
You can avoid the following mistakes during bass boat gel coat repair (or any other watercraft with gel coat).
- An incorrect ratio between gelcoat resin and hardener (or catalyst) can produce an inconsistent mixture.
Too much hardener can harden the gelcoat quicker, making application challenging. Too much resin, and you end up with a runny mixture, which can be problematic on vertical surface.
- Not choosing the right resources and keeping them organized can lead to mishaps.
- Not masking the damaged gel coat’s surroundings can produce more problems.
- Not observing the correct gelcoat curing time can be problematic due to improper curing.
Preventive measures to protect gelcoat
Here are some measures to protect your boat’s gel coat.
- Store the watercraft in a storage facility with exceptional 24/7 climate control. This tip is costly but worth the investment.
- Cover the vessel with the best possible boat wraps to protect it against potential damage.
- Use marine-grade fiberglass cleaning agents.
- Polish the boat’s gel coat before applying a marine-grade wax. Alternatively, you can apply polymer sealant after polishing.
- Clean the boat’s hull thoroughly before polishing and waxing.
Cost to repair gelcoat on boat
Hiring professionals to repair gelcoat on a boat is more expensive than DIY style. Most technicians charge $400 for every foot of gelcoat damage, with labor fees comprising most of the total cost.
Repairing the scratched or gouged gelcoat yourself will only entail several tens of dollars. For example, the Evercoat Fiberglass Gel Coat Repair Kit only costs about $65 on popular e-commerce sites.
Conclusion
Mastering how to repair boat gelcoat is as straightforward as picking the right color to match the existing hull hue. Surface preparation, resin preparation, and gelcoat application follow. Adding the finishing touches completes the project. You can complete this task within two days.
It’s worth pointing out that the steps outlined in this guide are for minor hull imperfections only. We recommend a more professional solution for serious problems, especially those involving the boat’s structural integrity.

Ten years of enjoying countless trips on boats never made me love them any less! So I am here to put all those experiences into good use for other boaters who want to have a safe and fun trip with their friends and families.

