
You don’t have to throw cardboard boxes as you can make boats out of them! With these boats, you can ace the regatta. Apart from making ones that can accommodate your weight, you can make small ones that kids can play with. So, how to build a cardboard boat?
Some may be complex to work on but there are simple ones that you can assemble easily with templates. Apart from creating a boat’s form, you can also integrate designs that make it look more fun and well-made.
This article will give you tips on making sturdy, cardboard boats that won’t sink and children can play with. Read on!
Table of Contents
The Basics of Making a Cardboard Boat
First, you have to know the basics of how to make a cardboard boat. This ensures that you won’t disregard the needed sturdiness when letting it float on the water.
To make you forget about your doubts, a race using cardboard boats was held in Cyrus Peirce Middle School. There were hundreds of participants who all enjoyed the event. The youngsters learned how to make a boat from scratch.
Just like what they did, you have to focus on these steps.
1. Pick a design
Before proceeding with the construction, you must think about the boat’s appearance. It’s practical to go for simple cardboard boat designs but it’s fine to pick a complex one as long as you’re willing to devote time and effort. You also have to consider the boat’s weight capacity. Decide whether only one or two people can be accommodated.
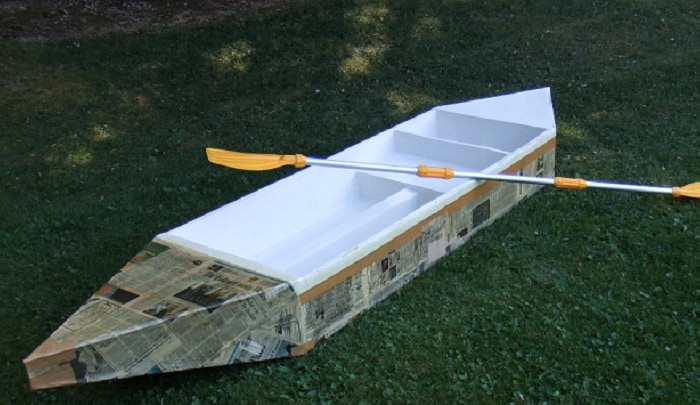
You also have to think about carrying and transferring it to designated areas. The cardboard boat must not be too large for the door. The designs of cardboard boats are usually modeled after sailboats, kayaks, and canoes. I’m referring to an easy simple cardboard boat.
On the other hand, you can go for more detailed and elaborate designs. Examples of these are the structures of Viking longboats and cruise ships. You can also use a boat with a V-shaped hull, which lets you glide on the waters smoothly. A wide boat guarantees more stability than a long, narrow one. You don’t want to tip over, so make a boat with a flat bottom.
2. Collection of materials
Collect enough cardboard sheets or boxes for a DIY cardboard boat project. You can get them from recycling centers or local stores. Boxes of old appliances also come in handy. You’ll need something to connect the parts. Tape is highly recommended but as you know, there are different types.
Duct tape holds well but it’s difficult to paint. In the case of masking tape, it’s easier to paint but it’s less watertight. Besides choosing tape, you’ll likely need waterproof glue to put parts together. House paint is ideal with a sealant. Avoid smudging it and make sure that you have enough paint for the interior and exterior sides of your boat.
3. Boat size calculation
This part is vital to make your boat stay afloat. Based on the recommended formula, 60 lbs of weight can take the place of a single cubic foot of water. Then, add the passenger’s weight to be divided by 60. The answer is the cubic foot of water that your boat can displace. You can achieve this number by carefully planning the boat’s dimensions.
As an example, a 5-ft long, one-ft tall, and 3-ft wide boat can remain afloat on water displacement of 15 cubic feet. Moreover, you can make your boat bigger given that the oars reach the water. When you make a smaller boat, the boat and passengers will eventually be in the water.
4. Detail-oriented
Testing can help you ensure that your project works. So, you can make a mini version of your cardboard boat. If you’d like to make a 10-ft longboat, you had to work on a 10-inch small cardboard boat first. You can put coins or rocks to act as the passenger.
In this step, you can find out if there are issues with your designs, which can be in sketch or PDF. You may make oars from cardboard but waterproof them so they will continue to serve you while paddling.
5. Design elements
Once you’re sure about the stability and sturdiness of the boat structure, you can be creative. You can go for whimsical designs like bananas, planes, school buses, and even Oscar Mayer Wienermobile. It will be exciting to follow a cardboard pirate ship kit from hacomo.
Guide to Making a Cardboard Boat
You can make cardboard boats that you can ride on or ones that kids can play with. Here are the guides that can give you different ideas.
1. Float with a cardboard boat connected by duct tape
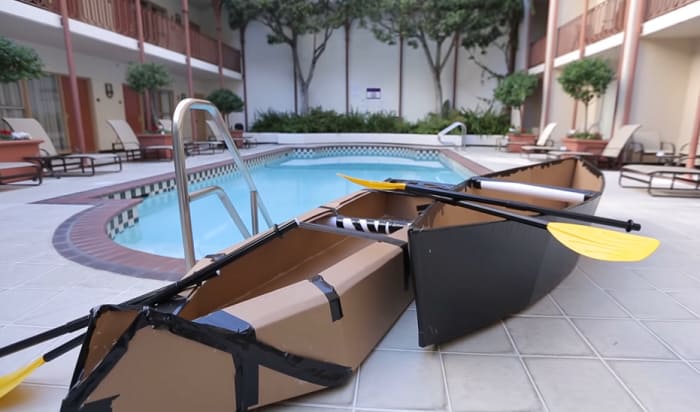
If you have plans to join a regatta or to make a sturdy boat for a school project, you can attach the parts with only duct tape. You’ll be surprised by how the parts come together by just following the instructions below.
2. Collect the materials that you need:
Cardboard, waterproof duct tape, scissors or box cutter, some pieces of paper for sketching or drawing your plans, paint (optional), and some decorations.
3. The basics and the base
Some may prefer a simple structure so the boat comes out in a box shape. But you can also upgrade it into a speed boat structure. An oval shape can be done too. Once you finalize the boat’s structure, you can draw them on the cardboard before cutting the base.
4. Making the walls
When making the walls, you have to determine the height that you want. It’s best to keep the walls in strips so you can save time and effort from taping them together.
You’re not putting your boat at risk of leaking in this way. Arrange the walls on the base that you prepared beforehand. Mark the areas where there are curves and score the lines so they’ll follow the lead.
Keep adding the walls and tape them inside and out. Make sure that you tape all the sides of the walls. Check if some parts of the base are sticking out and cut them.
5. Strengthening the boat structure
Give the bottom part attention and be generous in taping it as it’s the part that mainly touches the water. The next part where you can add tape is the sides before going to the other sections.
Score some cardboard strips that are 4 to 5 inches wide. Fold them in half so they make 90 degrees. Tape these strips to the bottom part of the boat for reinforcement.
You need cardboard that has similar size to your boat to strengthen the upper part. Cut it to create tabs that you can connect and tape on the sides and the top part.
6. Adding designs
You can add designs like putting a head on your boat. Then, you’re ready to go!
Using a kit for assembly
Elmer’s Build It Tools Kit will make this project easy for you. Other things that you need are cardboard boxes and a 3D corner bracket that is also from Elmer’s.
This guide is also applicable to little cardboard boats for playtime. Instead of using tape, you can use brackets and screws included in the kit.
Based on my experience, it’s easier to use than the tape which requires a lot of effort. However, these steps are for creating boats that won’t get in contact with water.
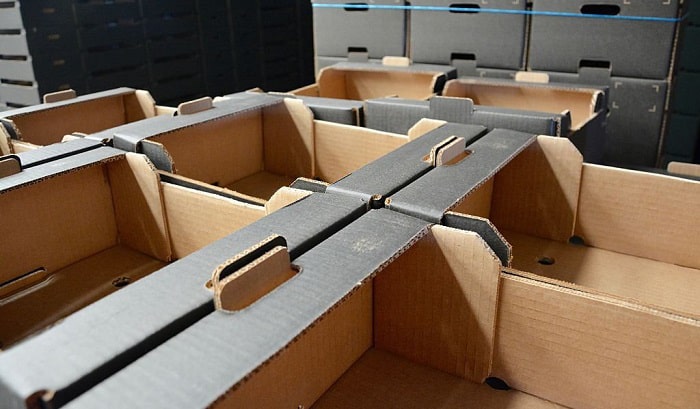
- Flatten the cardboard boxes that you have. Cut the top corners of one of the boxes so there are pointed tips. You have to make one rectangle and one isosceles triangle.
- You’ll devote your time to making a cardboard boat template for this project. The base is made by placing the pointed cardboard pieces in the middle. Two flattened cardboards should be curved on every side of the base. They’ll be connected with 4 screws.
- The remaining flattened card should be added to the back part. You have to attach it to the sideboards with the help of 2 screws and flat brackets. This back part should also be securely attached to the base.
- For extra support, add a 3D corner bracket to the front part of the base. Furthermore, a 90-degree bracket should be added to the top of the front sides. You can add a triangle cut as a sail and it’s ready to use.
Sail Away With a Cardboard Boat!
How to build a cardboard boat? There are two guides in this article. One is for boats that you can sail with and the other is only for making a toy boat. When you intend to sail with a cardboard boat, you have to take note of the basics so it won’t give in to the water. You can always be creative and add your preferred design.

Ten years of enjoying countless trips on boats never made me love them any less! So I am here to put all those experiences into good use for other boaters who want to have a safe and fun trip with their friends and families.